
The Definitive Guide to Climbing at Moore’s Wall: Quartzite, Classic Lines, and Logistics
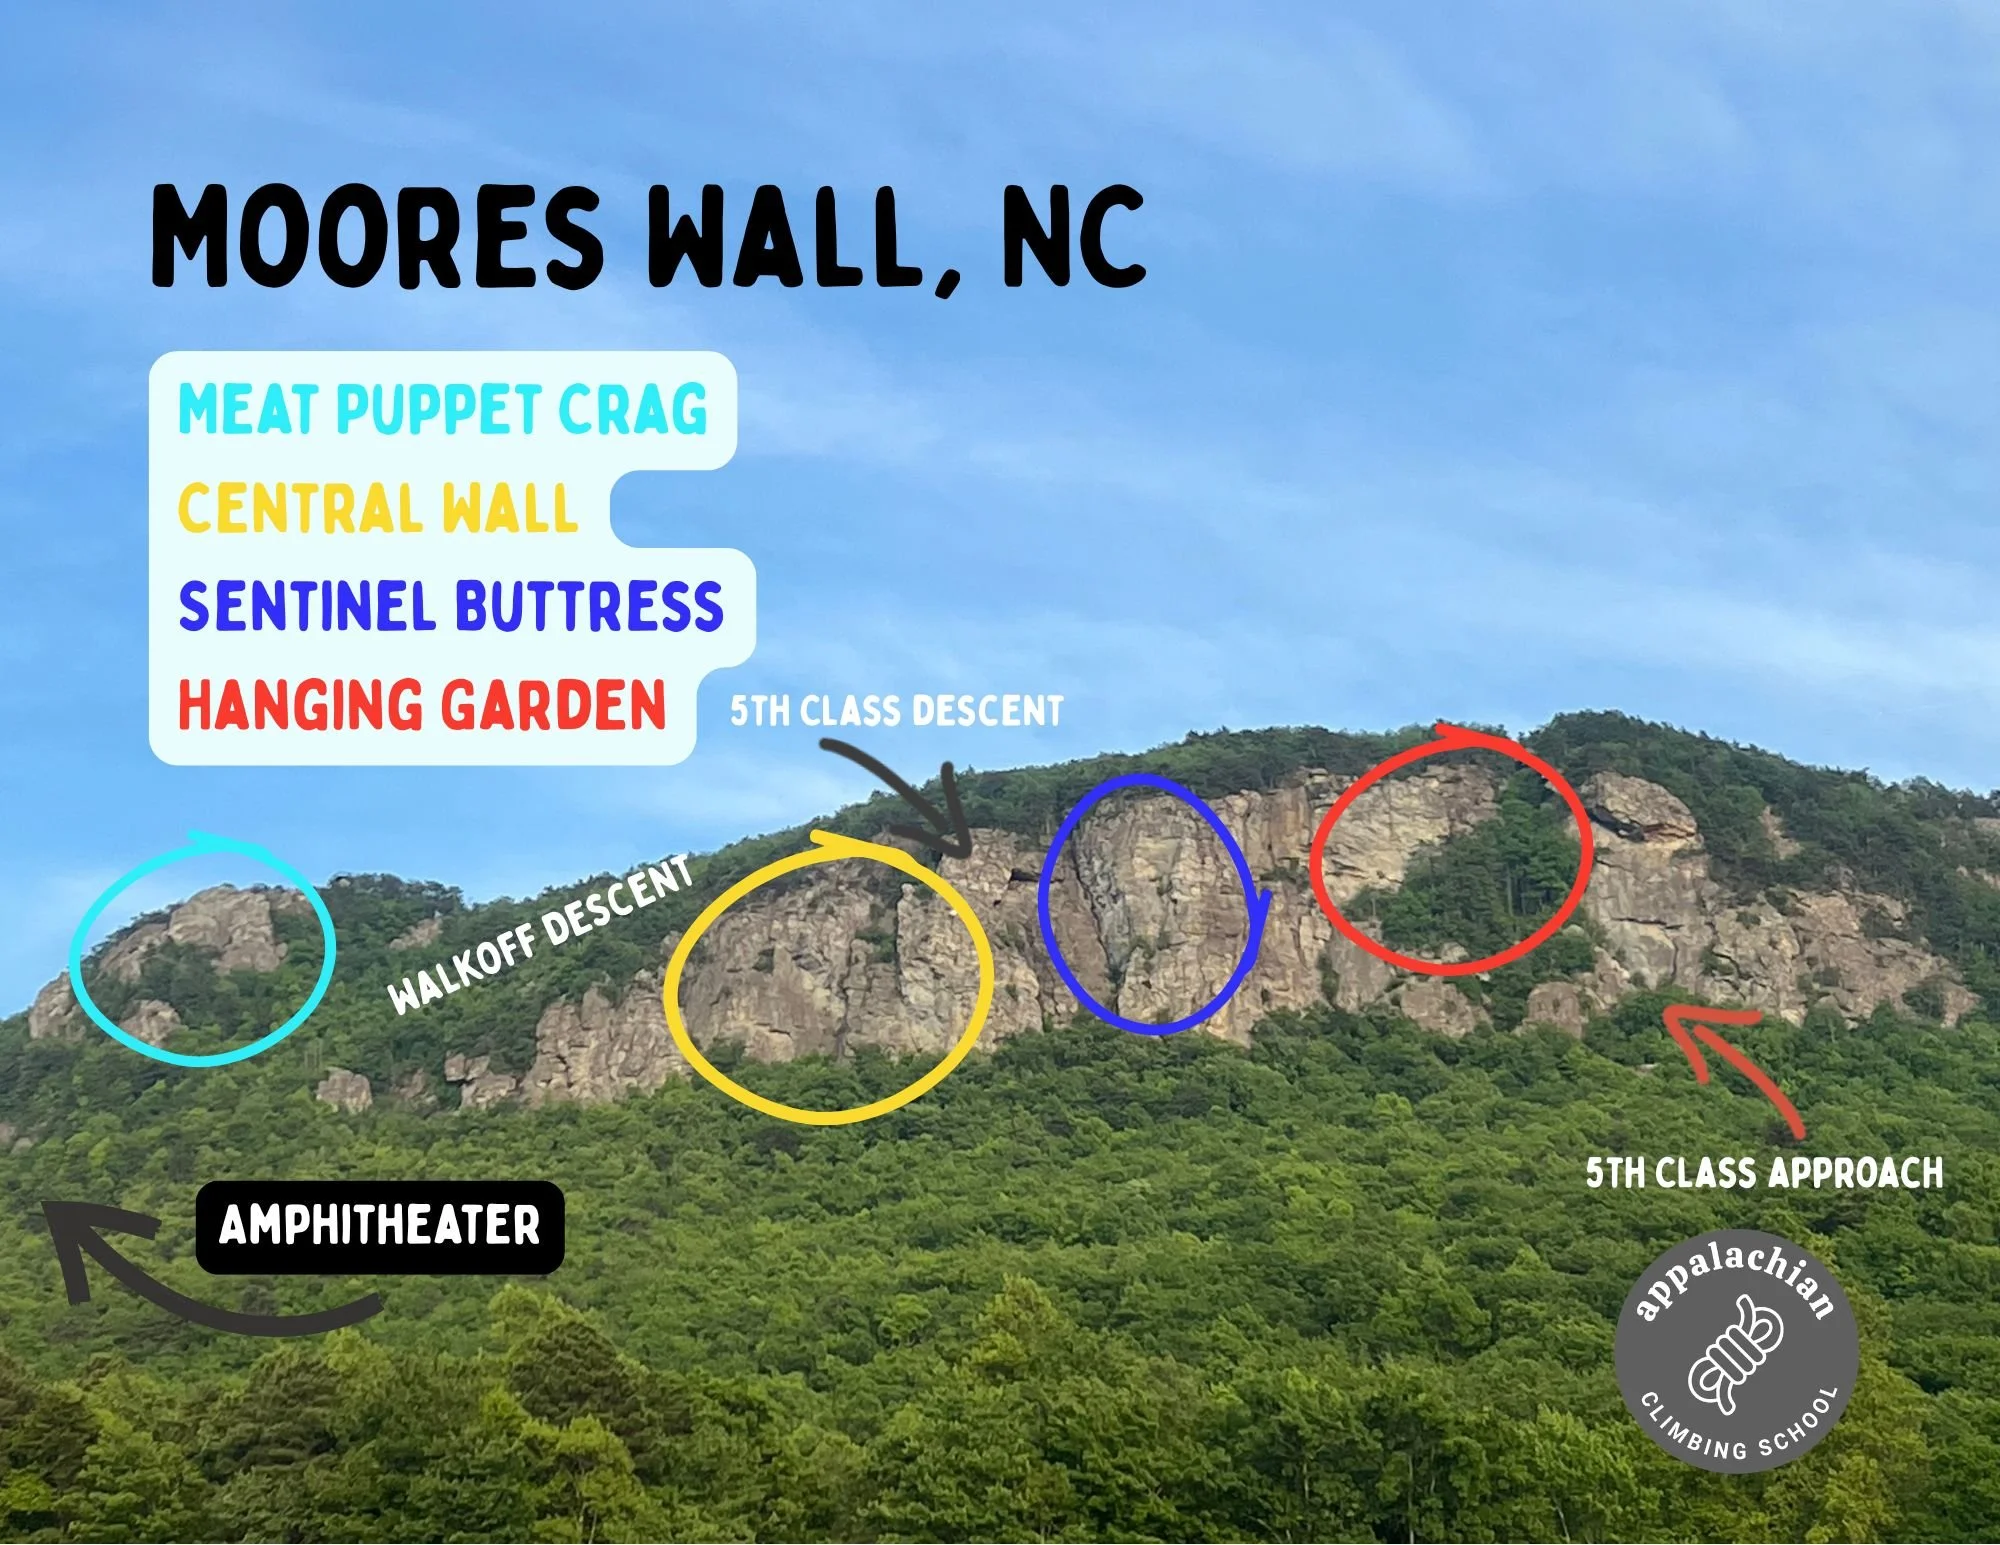
Tucked away in the Sauratown Mountains of the North Carolina Piedmont, Moore’s Wall is affectionately known by locals as the "trad pump palace." Unlike the smooth granite domes found further west, Moore’s is a steep, bullet-hard quartzite crag characterized by horizontal roof systems, deep vertical cracks, and incredible friction.
Whether you are an indoor gym climber looking to sample real outdoor stone or an aspiring traditional leader looking for the ultimate gear-placement training ground, Moore’s Wall delivers some of the best single-pitch traditional climbing on the East Coast.
In this logistics guide, we break down two of the most iconic zones on the cliff, the best classic routes to target, and where to find the best hidden top-rope zones.
Zone 1: The Amphitheater
The Amphitheater is one of the most visually striking features at Moore's Wall. As the cliff bands curve inward, they create an imposing, steep wall that offers dramatic exposure and highly technical movement.
Because of its orientation, the Amphitheater keeps you on your toes with continuous vertical face climbing, intricate gear placements, and roof sequences that will test your headspace. If you want to experience the true, stern character of Piedmont quartzite, this is where you wrap your hands around it.
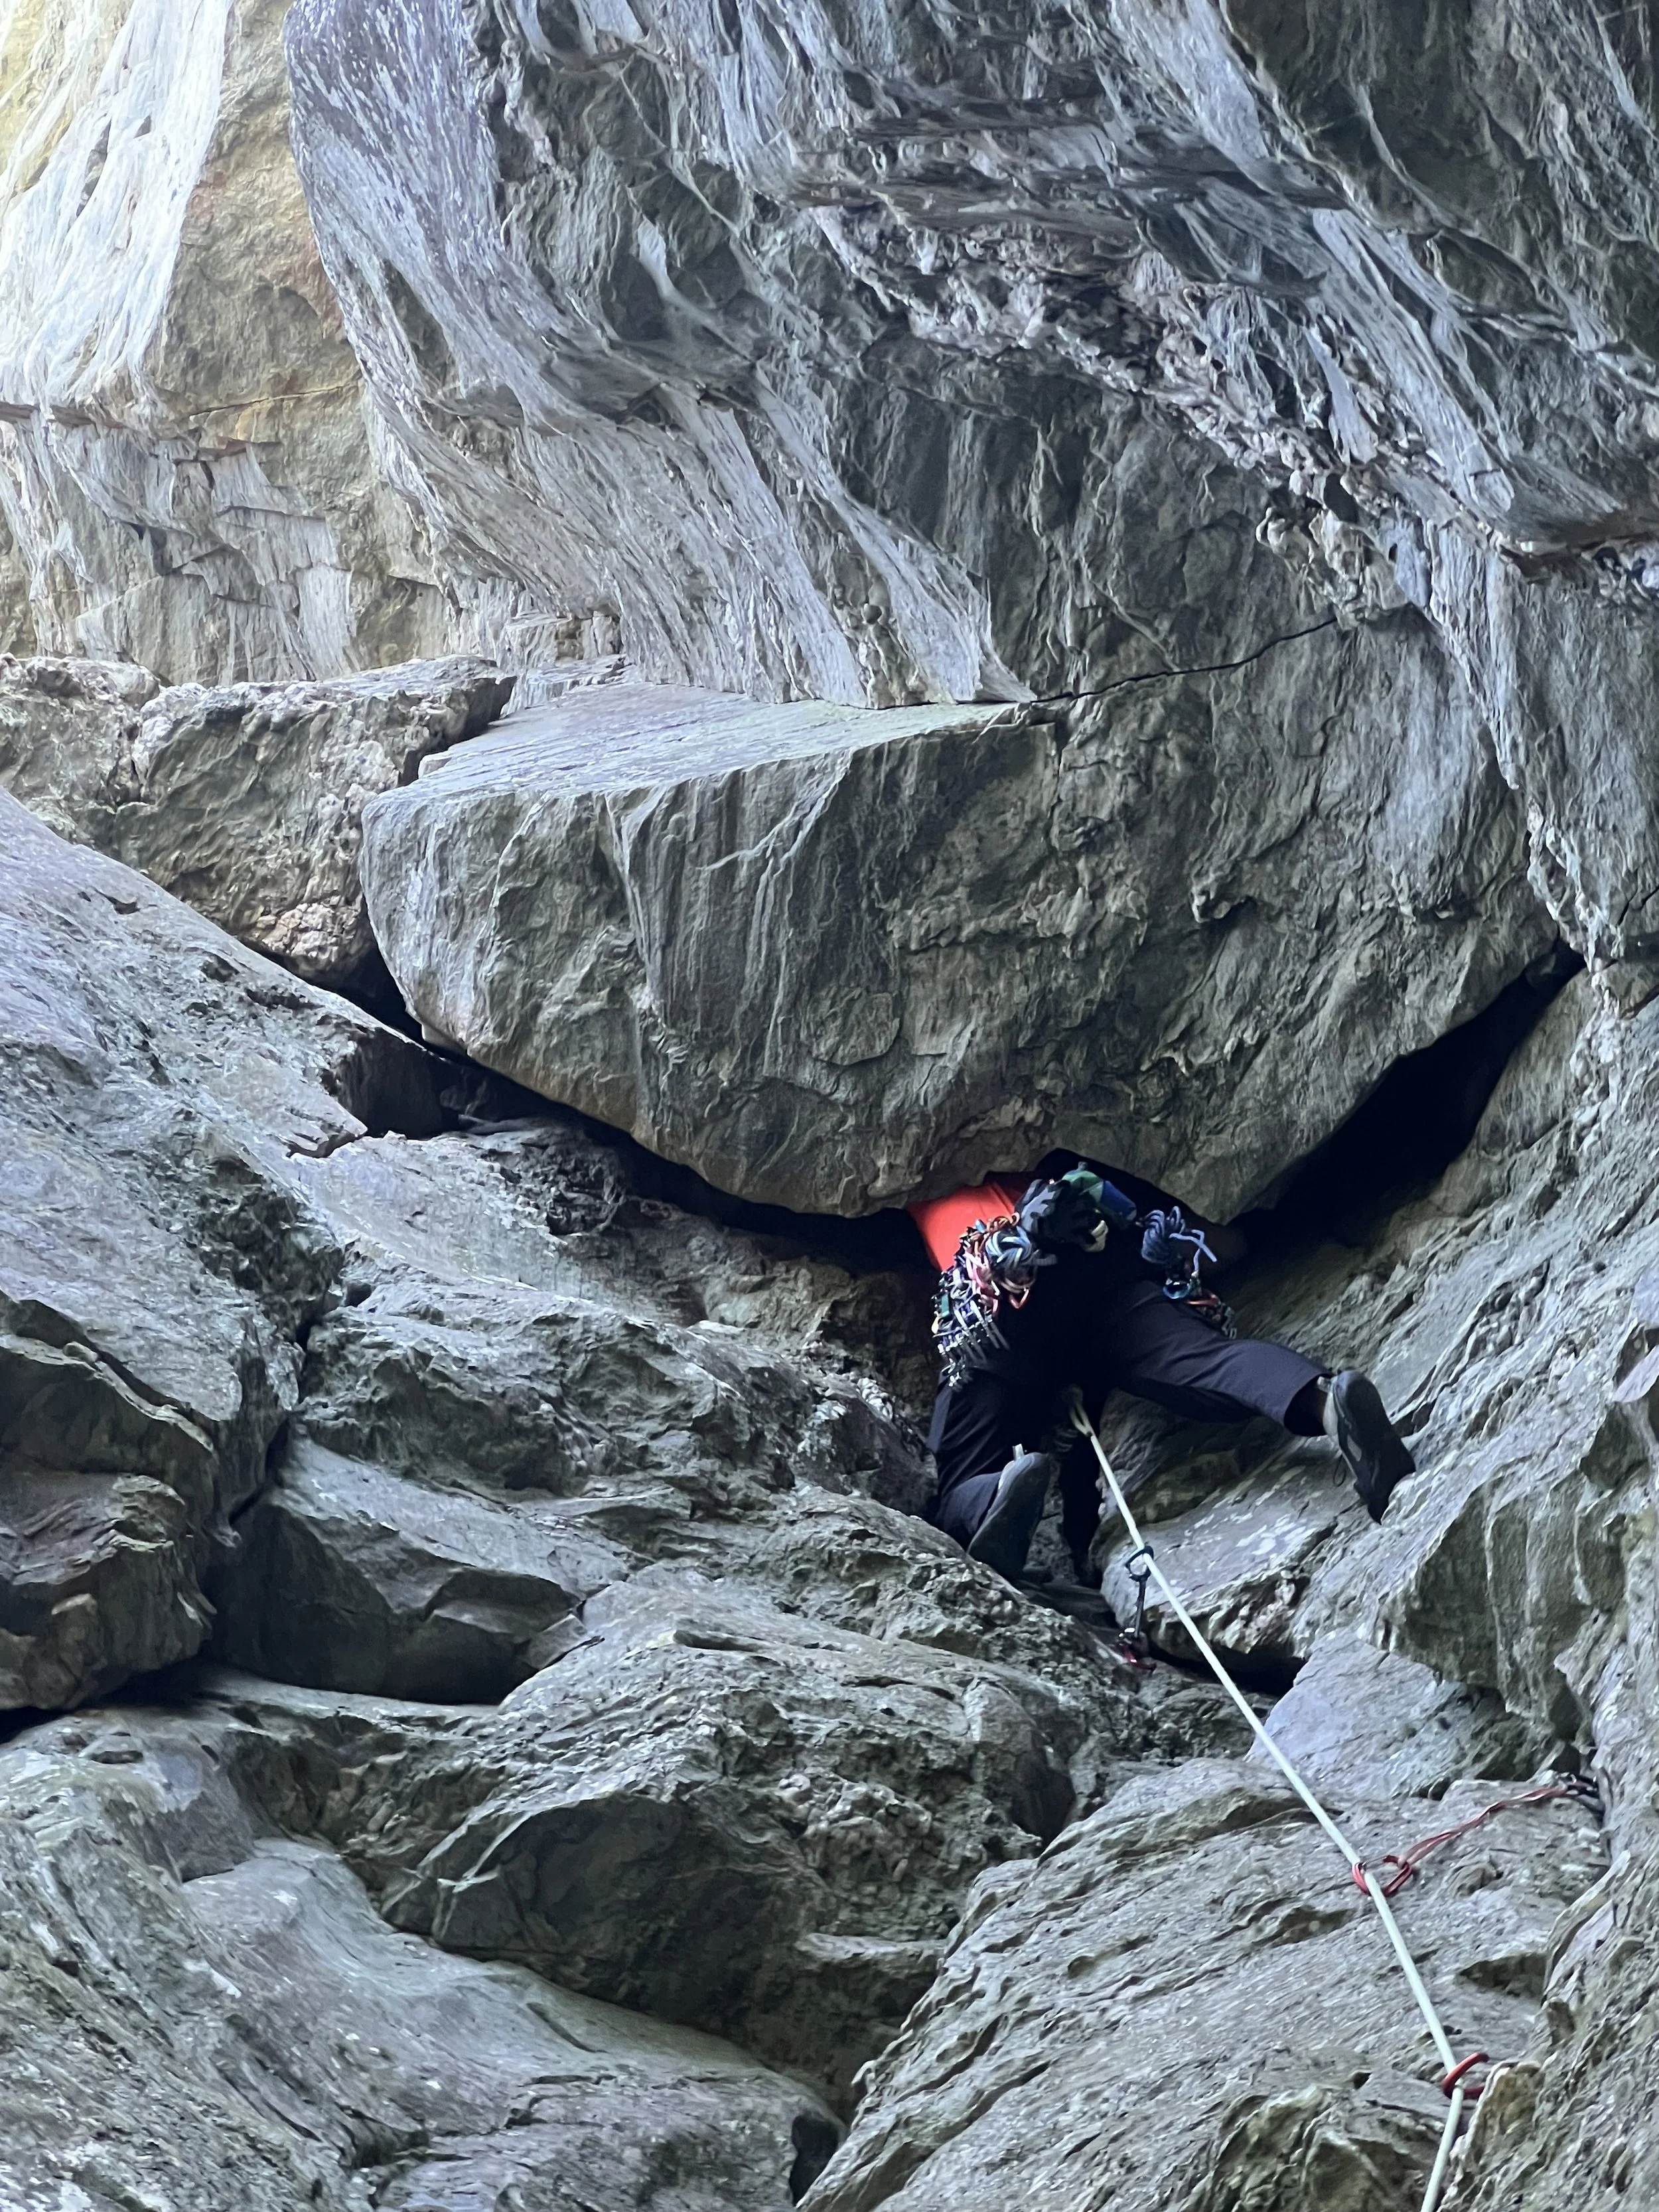
The other thing that will keep you on your toes are the descents. Be on the lookout for fixed anchors made of chocks and stainless steel cables. This style anchor are utilized in accordance with the strict local ethic of eschewing the use of bolts whenever possible.
Route Highlights:
Wailing Wall (5.6): Do not let the grade fool you—this is a great beginner classic. It features steep, continuous movement up a striking vertical face with brilliant gear placements. It is the perfect introduction to the physical and mental stamina required to climb in the Amphitheater. At the top a separate rappel station allows for a quick and free hanging rappel with a 60 meter rope.
Almost 7 (5.7): A legendary route. Almost 7 forces you to read sequence after sequence through a steep vertical crack. The most exciting part might be the leftward traverse once the crack ends. A few pieces of gear overhead keeps the traverse manageable. It is pumpy, technical, and absolutely unforgettable when executed cleanly.
Zone 2: The Sentinel Buttress
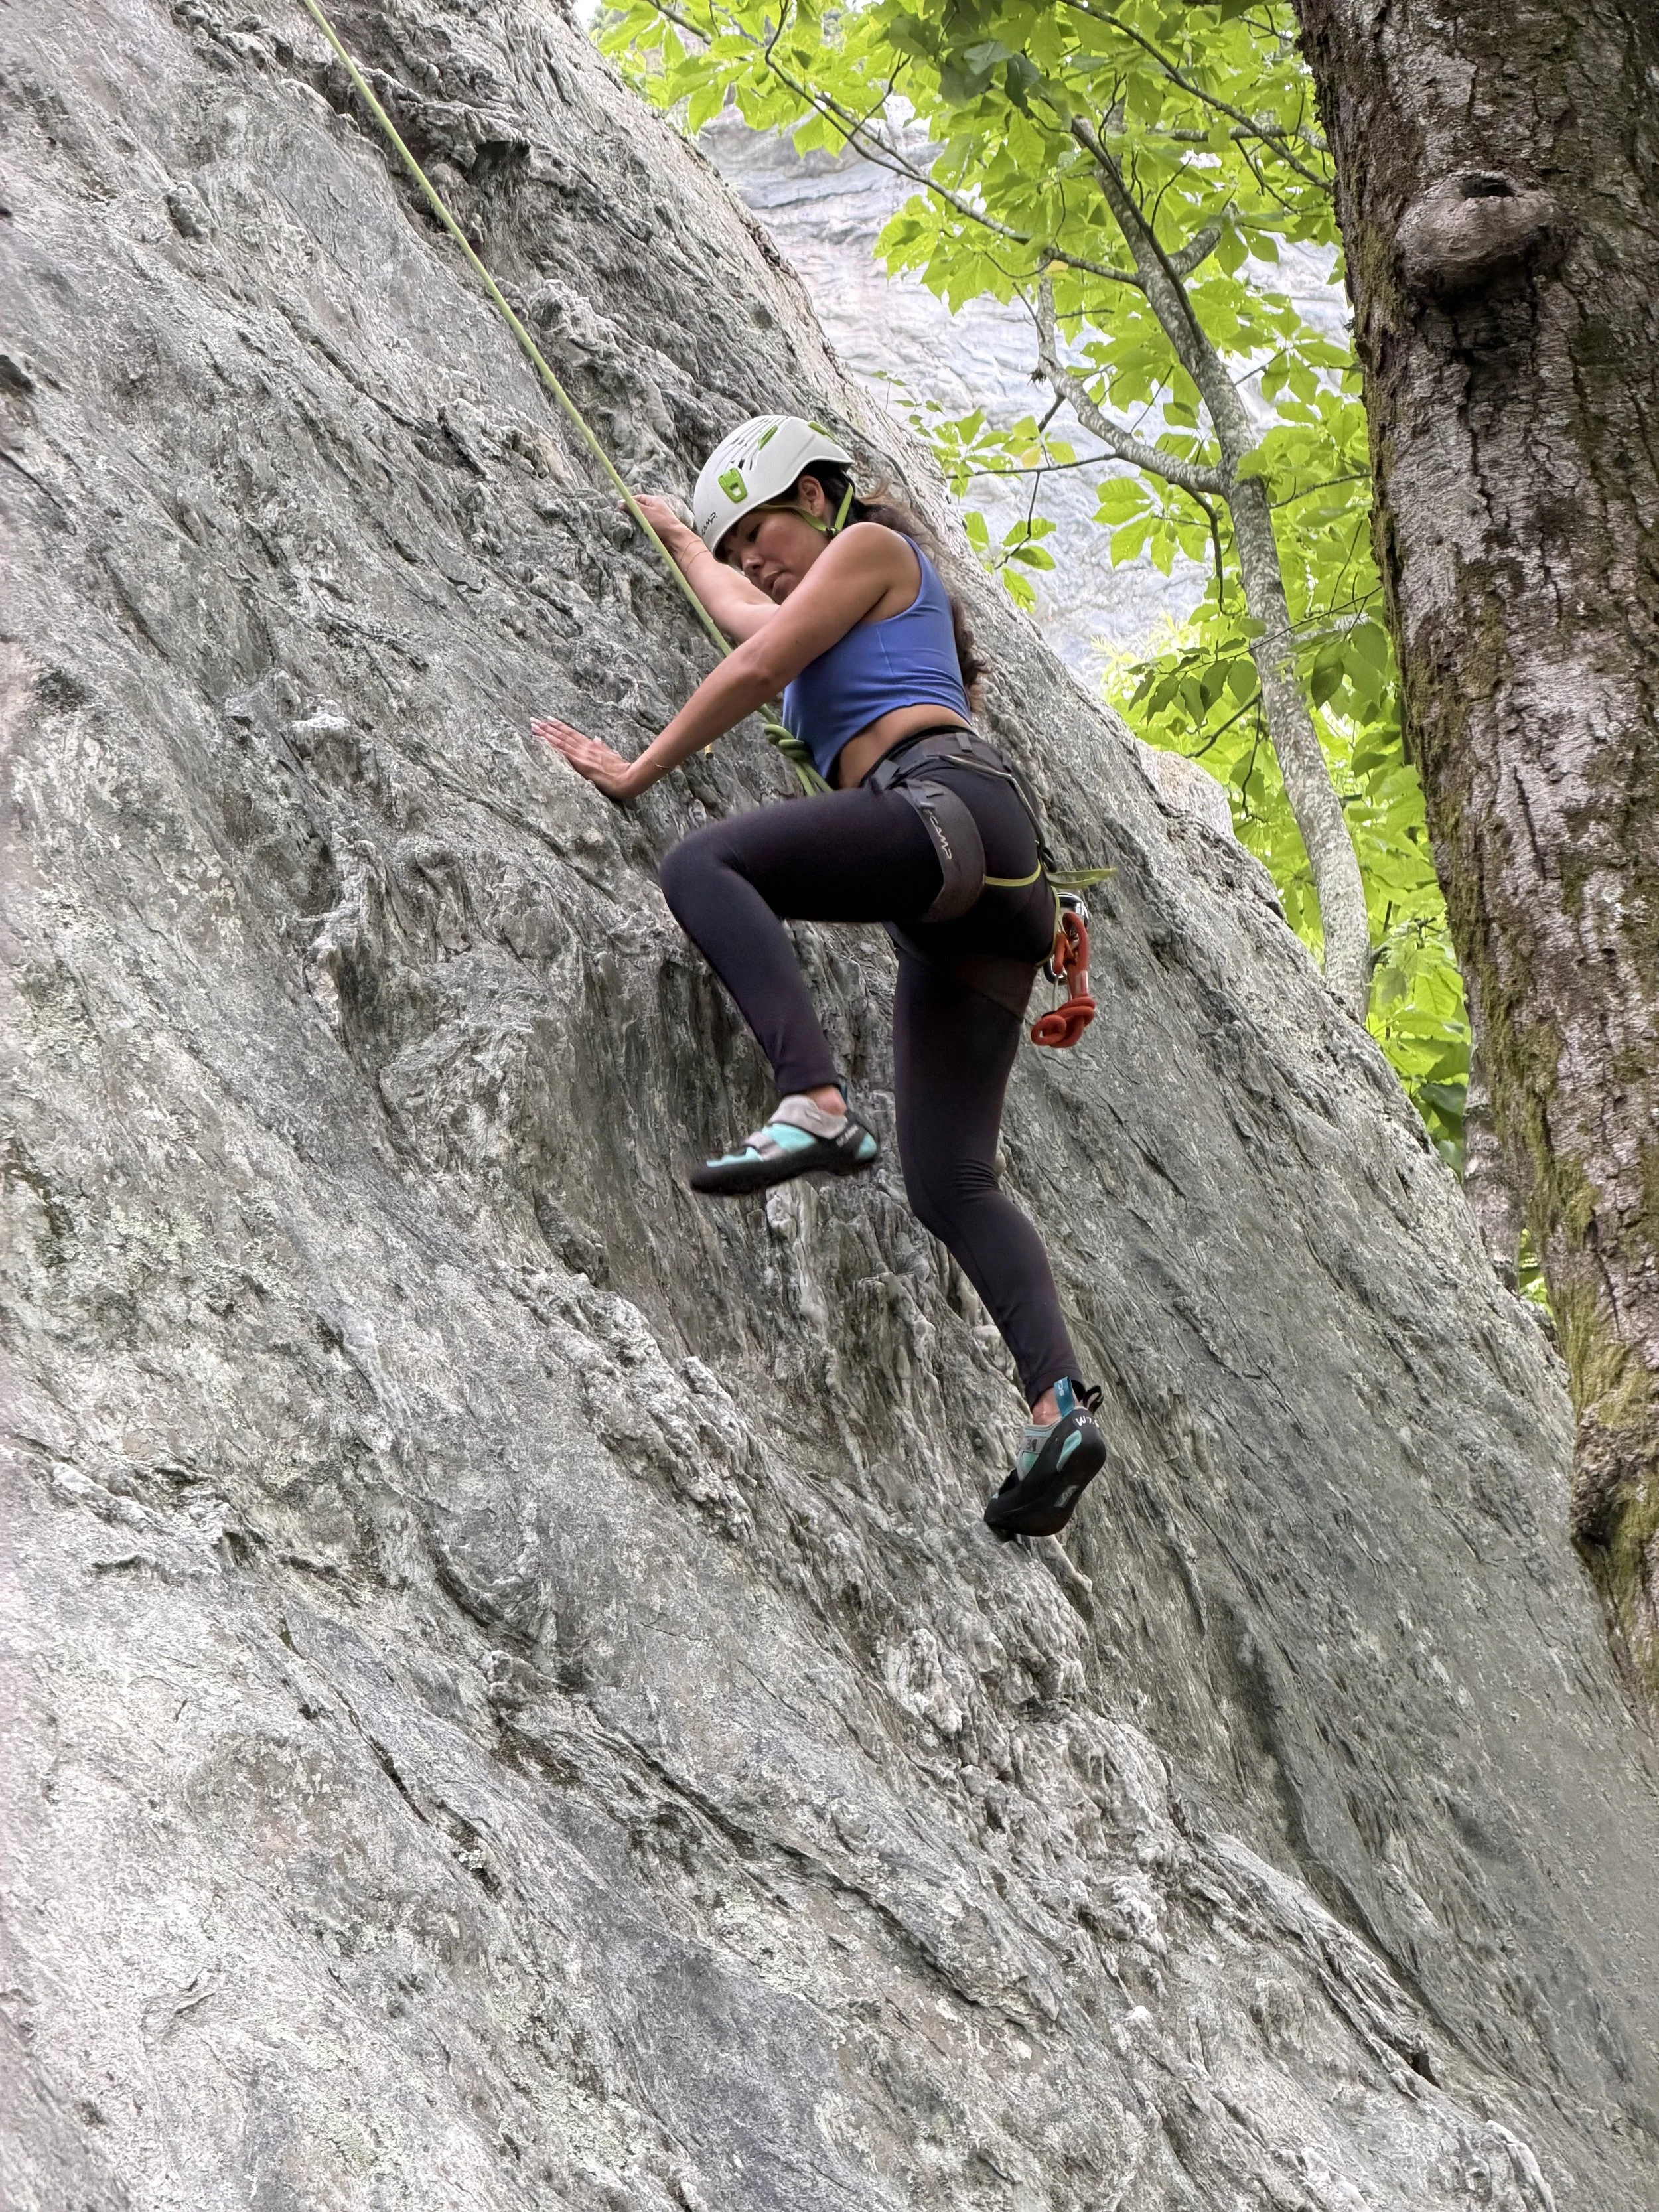
If you are working through our Trad Leading Semester Program or trying to build absolute confidence placing active cams, passive nuts, and tri-cams, the Sentinel Buttress area is a veritable playground for the burgeoning trad leader.
This zone features highly prominent, clean rock with a high concentration of moderate, beautifully protected lines. It is the perfect terrain for practicing smooth rope management, technical anchor building, and comfortable multi-pitch changeovers.
Head Jam 5.6
The Sentinel Leader's Tick-List:
Hopscotch (5.3): A spectacular entry-level lead. With massive holds and obvious, deep gear placements every few feet, it is an incredible route for practicing your rhythm on lead without high-stress pump factor.
Washboard (5.6): True to its name, this route follows beautiful, corrugated quartzite features. The climbing is fluid, rhythmic, and highly secure. In the upper section the billboard face is particularly exciting and the climbing is consistently vertical.
Easy Hard (5.5): A fantastic route that challenges you just enough, strategic gear placements right where you need them most. Often does as a shorter multi pitch route with a long rappel off a fixed anchor.
Head Jam (5.6): A classic physical crack feature that introduces climbers to the satisfying world of jams, pods, and body positioning on steep stone. The namesake feature is prime for photos of the climber in awkward positions.
Sentinel Buttress (5.5): The namesake line of the formation. It offers rich variety, taking you through distinct horizontal cracks and airy positioning that makes you feel like you are on a massive alpine face. Once at the top 2 long rappels get you back to the base of the wall.
Zoo View (5.7+): Arguably the most popular 5.7 route in the entire state of North Carolina. Zoo View delivers jaw-dropping exposure as you navigate a roaring line up the Circus Wall. It offers big holds, spectacular views of the valley below, and an absolute milestone for any outdoor climber.
The Hidden Gem: Top-Roping in the Boulder Field
Not every day at Moore’s Wall requires a heavy trad rack or a complex multi-pitch system. For families, groups, or gym climbers looking for a low-consequence, high-fun day of movement, excellent top-roping can be had right in the Boulder Field located along the approach trail.
Several of the large, freestanding quartzite blocks feature easily accessible tops where bulletproof top-rope anchors can be safely built entirely from traditional gear, allowing you to sample great beginner climbing in a relaxed setting without the stress of managing a lead rope.
Great Beginner Climbing in the Boulder field
Master Moore's Wall with Appalachian Climbing School
Navigating the approach trails, deciphering old-school guidebooks, and figuring out the descents and complex gear placements unique to Piedmont quartzite can be a steep learning curve.
Whether you want to tick Zoo View with a competent partner, spend a day top-roping in the boulder field with your family, or join our structured Trad Leading Semester to safely master routes like Hopscotch and Sentinel Buttress, we have you covered.
Our Head Guide, Wes Calkins, has been guiding Western and Central NC since 2011. Let us handle the route-finding, risk management, and logistics so you can focus entirely on the climbing.
👉 [Click Here to Book Your Private Custom Day at Moore's Wall]
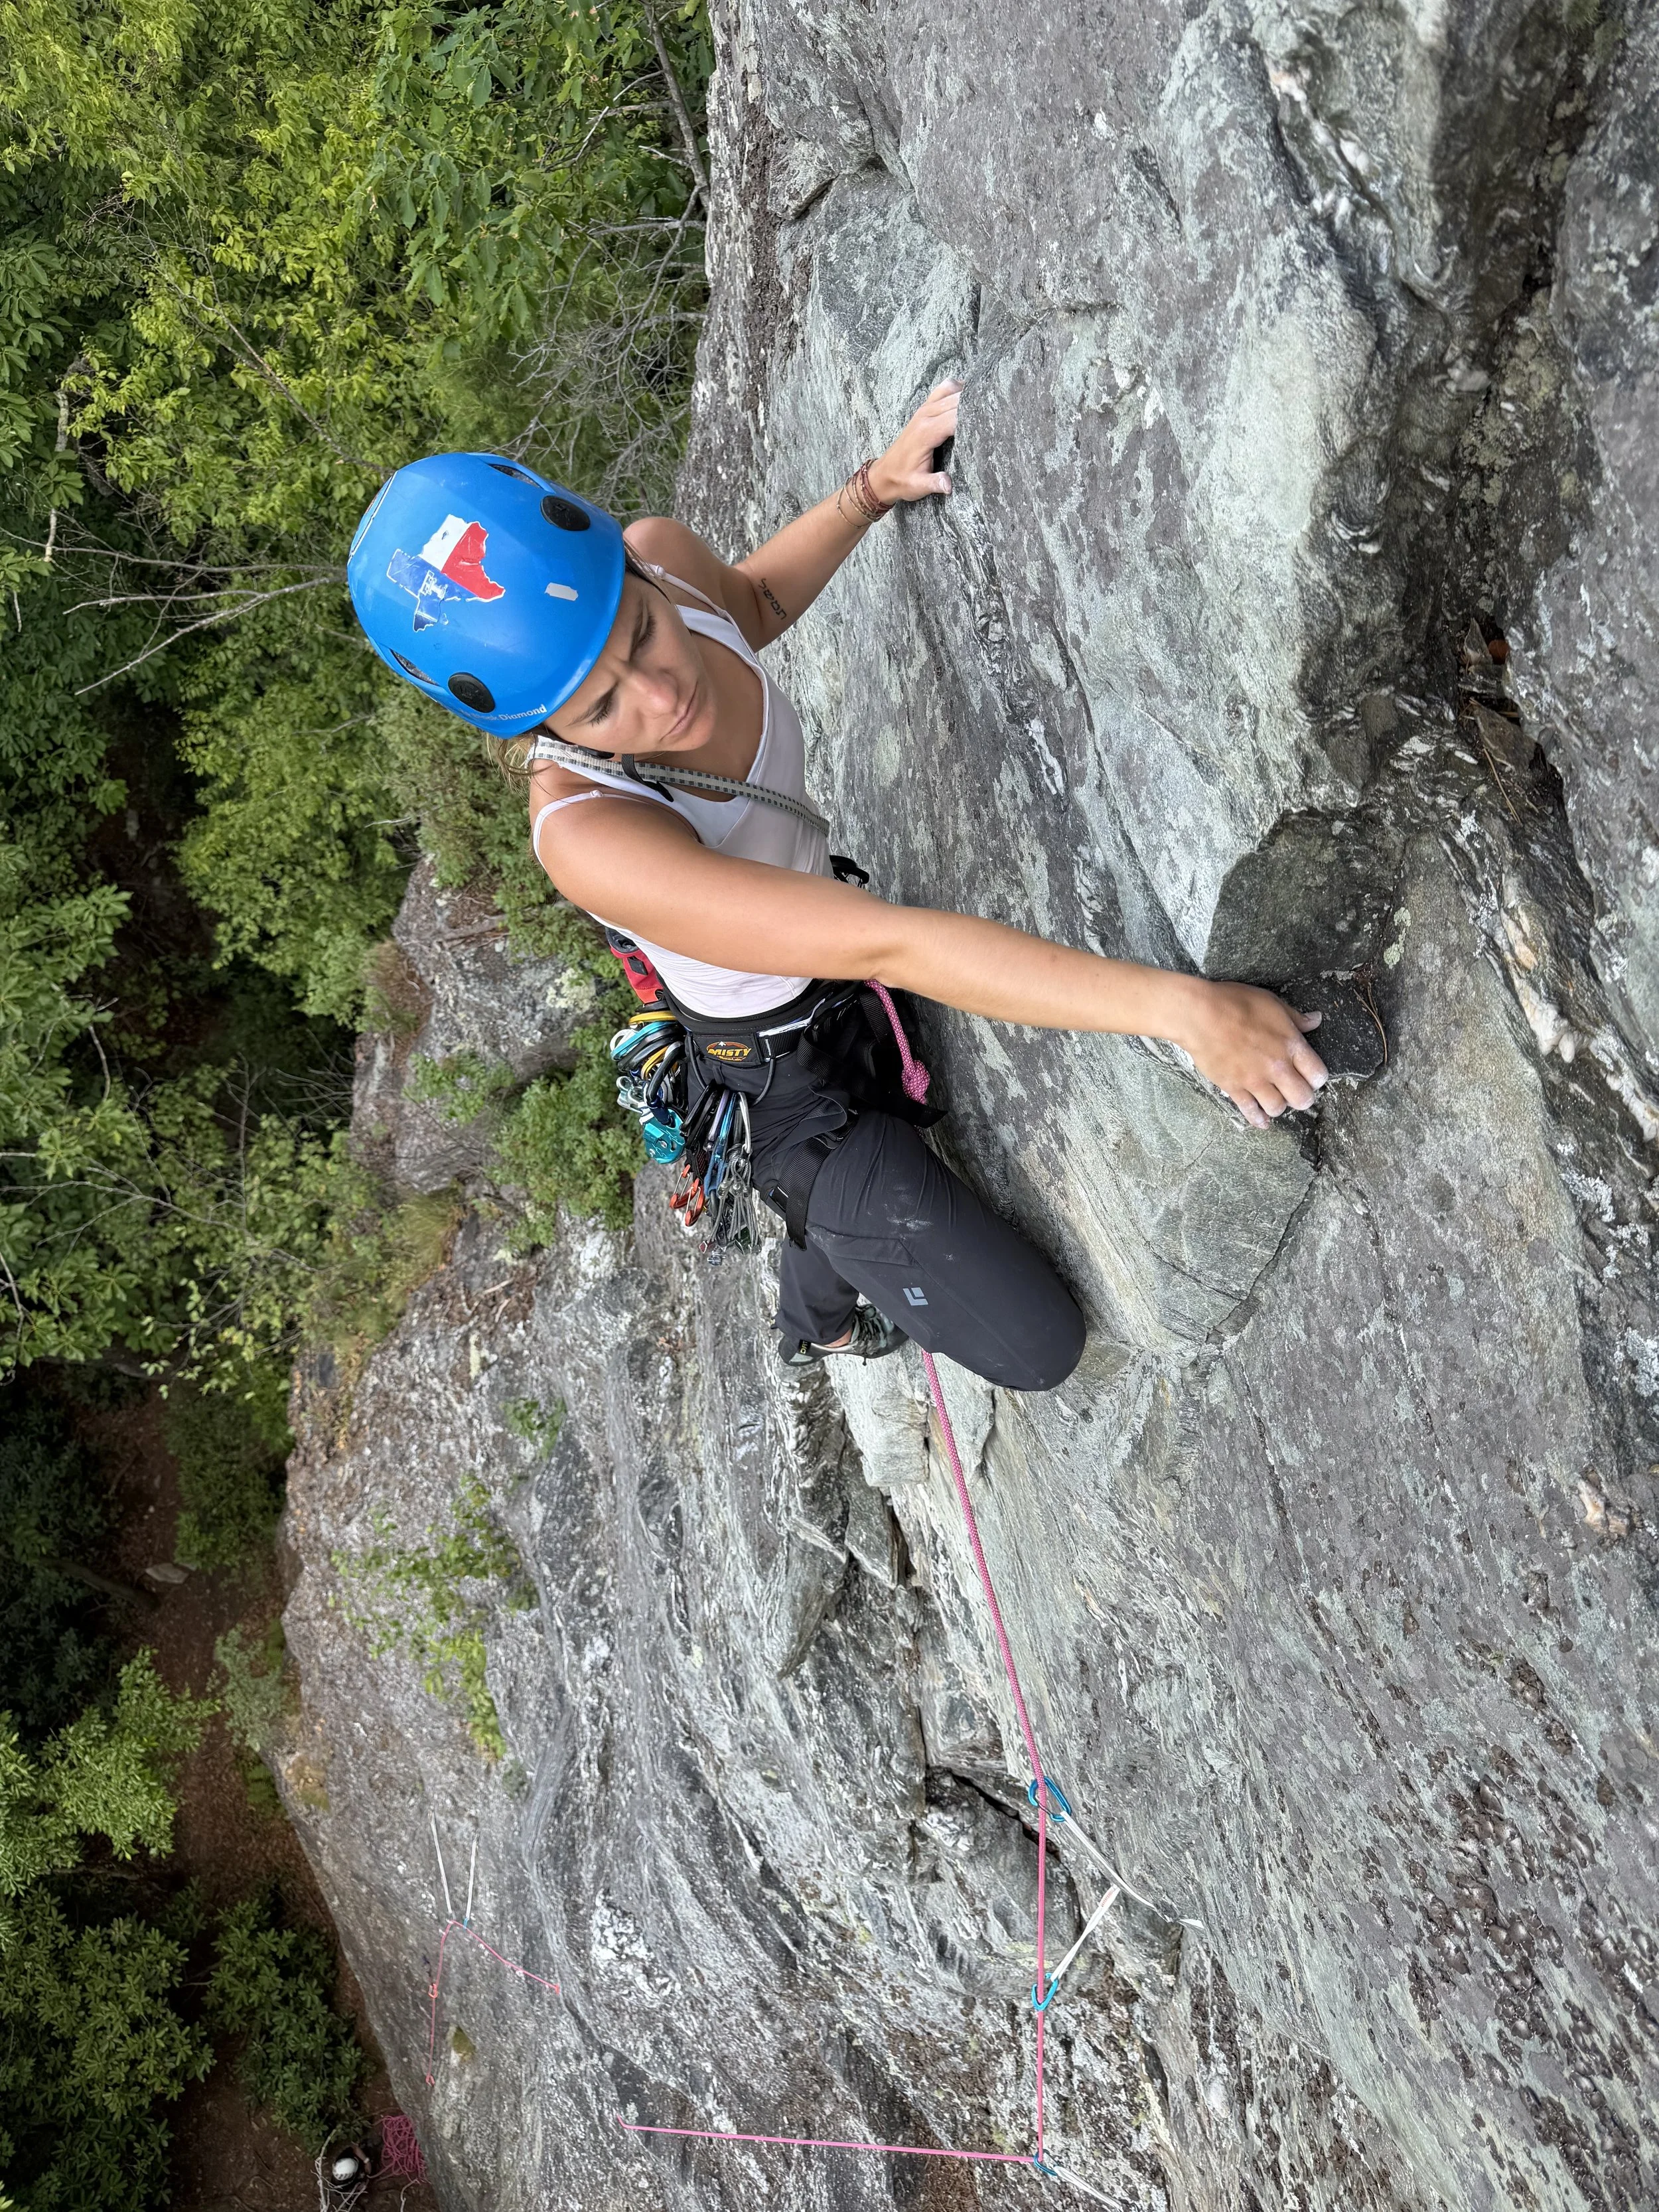
A graduate from our Trad Semester leading a route near the Amphitheater